Heya, I figured I'd write up another battle report, this time writing one up for WiseKensai's Bromad Academy challenge.
As a little disclaimer, I was going to write up a tournament report for one I participated a few weeks ago but I had lost the photos and one of my games was a bye, so I kind of lost the motivation to write it up. Though in the future, I'll definitely get one out even if I get a bye game I play.
Moving onto the actual battle report, me and my opponent agreed to do a classic mission Hunting Party with the matchup being my HaqqIslam versus Starmada. If you are not familiar with the mission before, it was in previous ITS seasons in N3 but never got ported over to N4. Which I do find a shame because it is a mission where you cannot outright kill your opponent but have to 'capture' them in order to score points on top of having a couple buttons to press. In order to make it work, everyone gets stun pistols that shoot rounds that immobilize-A (for the purposes of this game, we treated them being like adhesive launchers that shoot at the range of a pistol), and veterans get adhesive launchers.
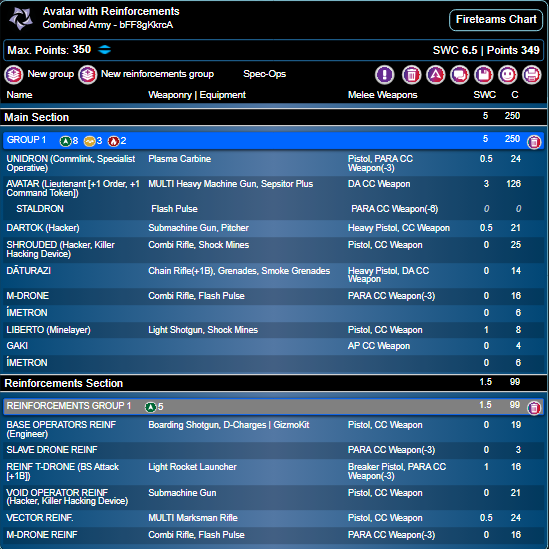
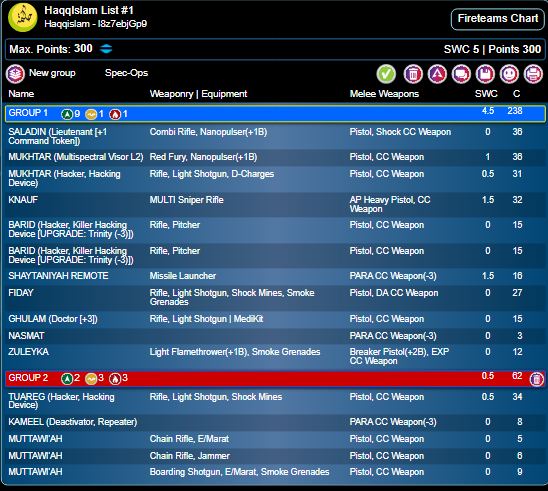
HaqqIslam List:
Dice Abide Irregular challenge
──────────────────────────────────────────────────
GROUP 1 8 / 2 / 1
SALADIN (Lieutenant [+1 Command Token]) Combi Rifle, Nanopulser(+1B) / Pistol, Shock CC Weapon. (0 | 36)
MUKHTAR (Multispectral Visor L2) Red Fury, Nanopulser(+1B) ( ) / Pistol, CC Weapon. (1 | 36)
MUKHTAR (Hacker, Hacking Device) Rifle, Light Shotgun, D-Charges ( ) / Pistol, CC Weapon. (0.5 | 31)
BARID (Hacker, Killer Hacking Device [UPGRADE: Trinity (-3)]) Rifle, Pitcher ( ) / Pistol, CC Weapon. (0 | 15)
BARID (Hacker, Killer Hacking Device [UPGRADE: Trinity (-3)]) Rifle, Pitcher ( ) / Pistol, CC Weapon. (0 | 15)
SHAYTANIYAH REMOTE Missile Launcher / PARA CC Weapon(-3). (1.5 | 16)
KNAUF MULTI Sniper Rifle / AP Heavy Pistol, CC Weapon. (1.5 | 32)
FIDAY Rifle, Light Shotgun, Shock Mines, Smoke Grenades / Pistol, DA CC Weapon. (0 | 27)
HUNZAKUT (Forward Observer) Rifle, Light Shotgun, Shock Mines ( | Deployable Repeater) / Pistol, CC Weapon. (0 | 18)
ZULEYKA Light Flamethrower(+1B), Smoke Grenades / Breaker Pistol(+2B), EXP CC Weapon. (0 | 12)
GROUP 23
LIBERTO (Minelayer) Light Shotgun, Shock Mines / Pistol, CC Weapon. (1 | 8)
HAWWA' (Hacker, Hacking Device) Boarding Shotgun, D-Charges ( ) / Pistol, CC Weapon. (0.5 | 26)
GHULAM (Doctor [+3]) Rifle, Light Shotgun ( | MediKit) / Pistol, CC Weapon. (0 | 15)
NASMAT PARA CC Weapon(-3). (0 | 3)
DAYLAMI (Camouflage [1 Use], Infiltration) Light Shotgun, Panzerfaust / Pistol, CC Weapon. (0 | 8)
WARCOR (360º Visor) Flash Pulse ( ) / Stun Pistol, PARA CC Weapon(-3). (0 | 3)
6 SWC | 301 Points
(Disclaimer: This list was played on the weekend before the change to ITS 14 so this list reflects what would have been a legal list in ITS 13)
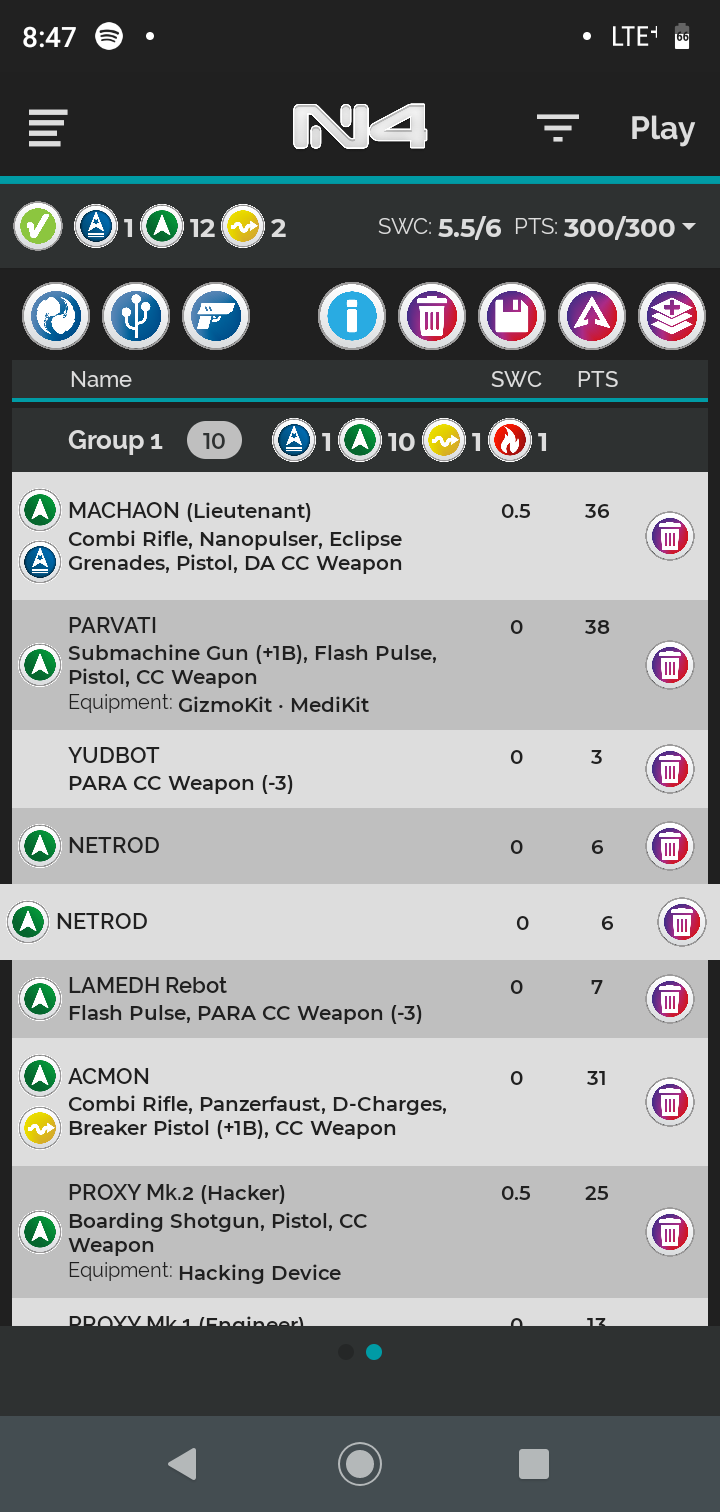
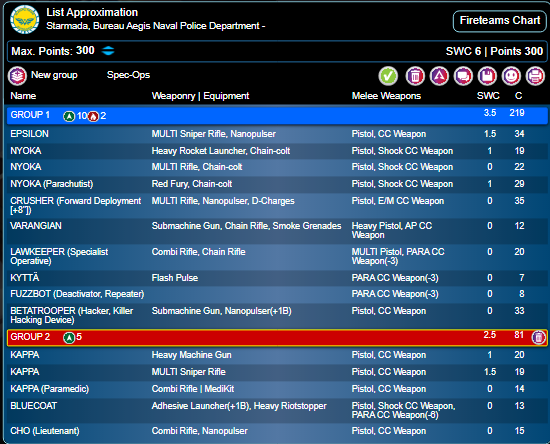
Starmada List:
Opponent's List
──────────────────────────────────────────────────
10
SALADIN (Lieutenant [+1 Command Token]) Combi Rifle, Nanopulser(+1B) / Pistol, Shock CC Weapon. (0 | 34)
NYOKA (Forward Observer) MULTI Rifle, Chain-colt / Pistol, Shock CC Weapon. (0 | 23)
EPSILON Heavy Machine Gun, Nanopulser / Pistol, CC Weapon. (1.5 | 35)
SHONA CARANO Submachine Gun, Nanopulser(+1B), Flash Pulse / Pistol, EXP CC Weapon. (0 | 27)
CHAKSA LONGARM Missile Launcher, Pulzar / Pistol, CC Weapon. (1.5 | 25)
CHAKSA LONGARM Portable Autocannon, Pulzar / Pistol, CC Weapon. (1.5 | 30)
PSI-COp (Hacker, Hacking Device) Combi Rifle, Nanopulser(+1B) ( ) / Heavy Pistol, CC Weapon. (0.5 | 24)
KNIGHT OF SANTIAGO (Hacker, Killer Hacking Device) Combi Rifle, Nanopulser, D-Charges ( | TinBot: Firewall [-3]) / Pistol, DA CC Weapon. (0 | 39)
BRONZE Red Fury(+1 Dam) / Pistol, E/M CC Weapon, PARA CC Weapon(-6). (1 | 56)
KYTTÄ Flash Pulse / PARA CC Weapon(-3). (0 | 7)
6 SWC | 300 Points
Initative Roll:
Winner: Starmada
Turn Order: Starmada
Deployment: HaqqIslam
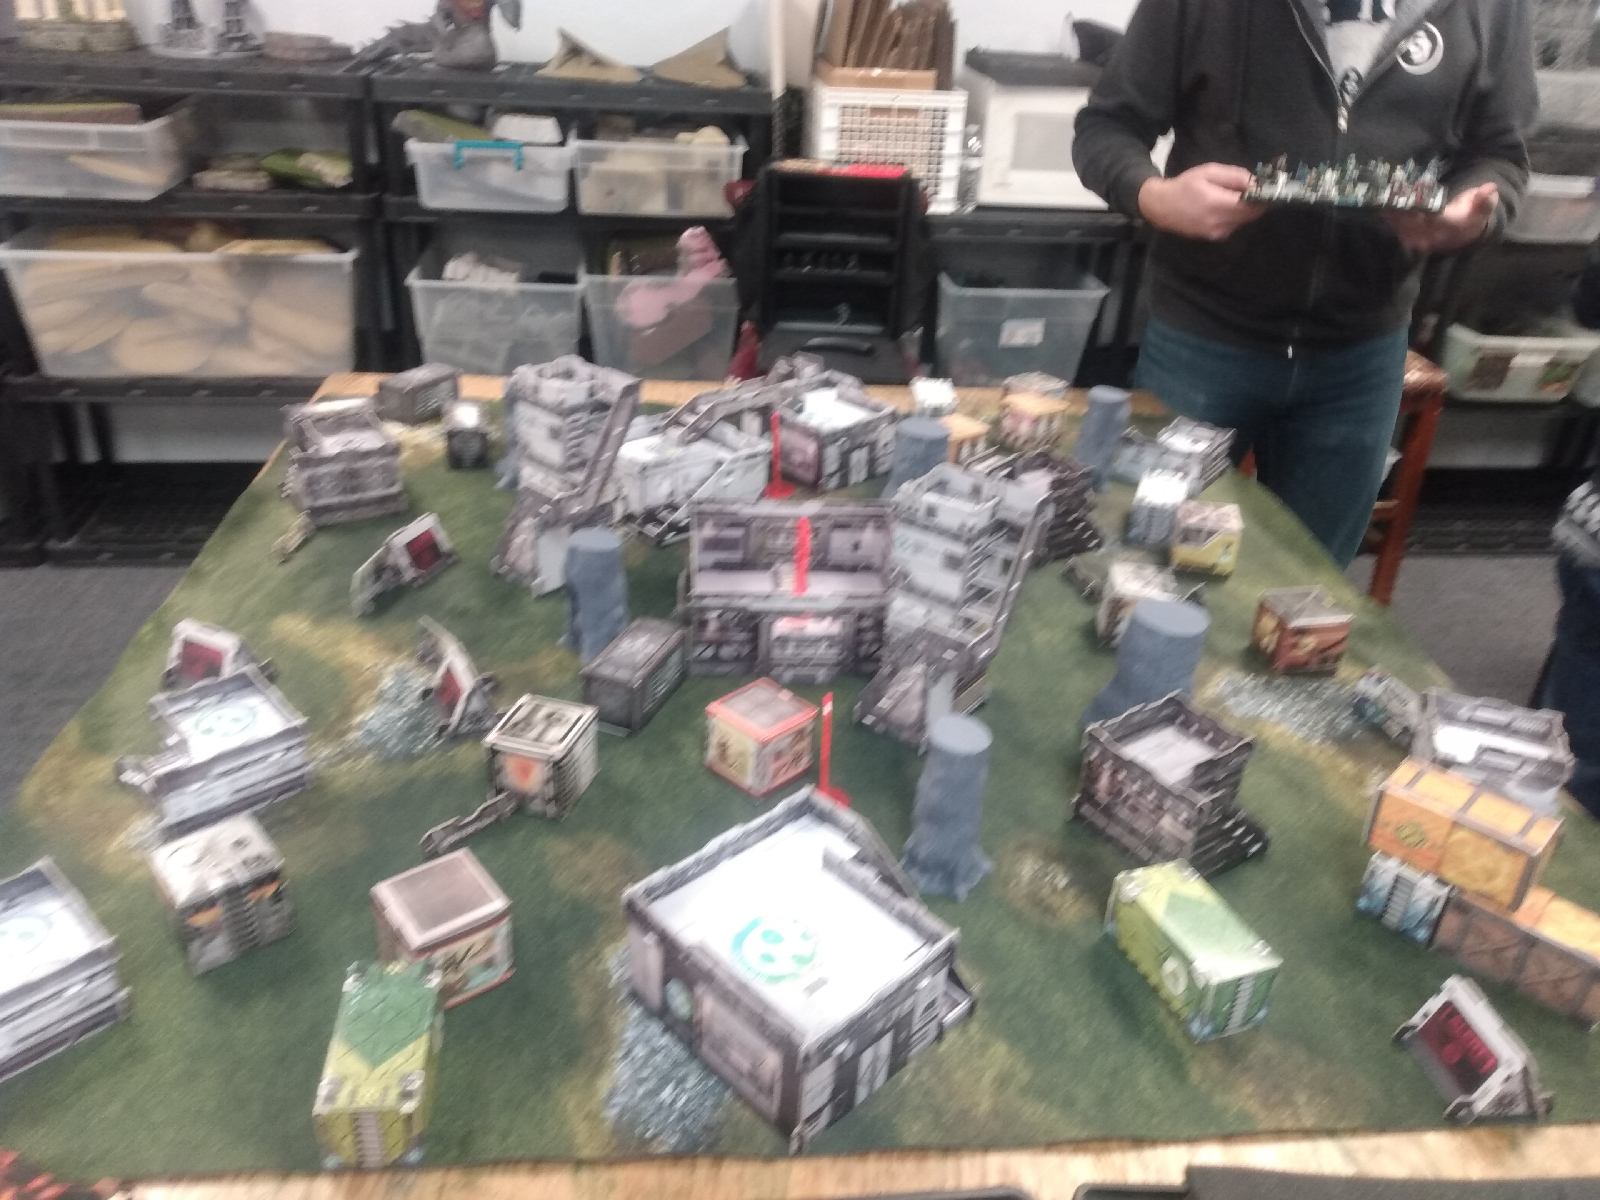
Since my opponent decided on first turn, I elected to have him deploy first. Which he had a duo of a Bronze Red Fury+Santiago KHD on his right-hand side, with a Chaksa Longarms in the middle and a three-man core of a Epsilon HMG, Shona Corano, and Nyoka FO in the link. The Chaksa Longarms haris was three models he held in reserve thanks to Saladin and a command token.
I deployed rather defensively save for the Daylami standing up and Fiday more forward than it should have been to force him to waste orders on it in theory. I also spread out my models to counter-deploy against a potential alpha strike he could have used to get into my DZ. The Liberto held down the left flank to have the HI duo slow down its potential advance some distance behind the Fiday.
Round One:
Turn one: Starmada
Since he had only one command group, I strip two orders out of it but left him with 9 out of realistically 11 because of Saladin. Most of the turn, he moved up his duo to engage the Fiday with his Santiago and my camo Daylami with his Bronze Red Fury in the next few orders. He tries to discover with the knight but fails. Then he activates his Bronze Red Fury after he had managed to get the Daylami out of camo with his flash pulse both IIRC. While not the best situation I had my Daylami in, I decided to dodge to save my panzerfaust rounds I decide to dodge out of the way. While I had failed, I managed to pass both my armor saves he got on me and fail guts to go prone and out of line of sight.


He decides then to use his Bronze to discover my Fiday, which he eventually does over the course of three orders to down him. The Knight then attacks him with a template, which I do the same but goes unconcious while his Santiago makes his save. Then he moves his Bronze back up on top of the building and holds it in ARO.
Turn One: HaqqIslamI needed to get rid of both the ML Chaksa Longarms that was standing up in ARO and potentially the Bronze if it could be done. So Zulyeka runs up with her bike with impetuous to move into a good position to throw smoke in the next order or so. However with must frustration and annoyance what should have been one order turn into three or four, and only block the line of the sight of the Bronze. So from there Knauf engaged ML Chaksa Longarms, but took orders to take him down. Then attacked the Bronze through smoke, which managed to oneshot him.
This left me a few orders left, so I elected to do a coordinated order to move both my hacker and Knauf, this time moving Knauf out of line of sight and moving the Barid up to shoot his pitcher to land spotlight on his three-man core. With the few remaining orders in that group, Zuleyka moved back into full cover.
Using my second order group then, the Panzerfaust Daylami stood back up and then the Liberto walked up to his Knight. While I went into this engagement expecting my Liberto to die and take a few orders to possibly kill the Santiago or at least put a wound on him, I got really lucky and one-shot his knight while my Liberto managed to tank his BTS save from the Nanopulser. The last order is him moving towards the wall and laying down a mine.
Round 2: Turn Two: Starmada
Killing three out of 10 units in his list was a good trade for losing my Fiday's mispositioning, but he still had Saladin around and had a total of nine orders to play around with. So, in essence I did bring him down to his original orders he had after stripping two orders turn one. For the most part, his turn was him moving up his three-man core. I managed to get a few spotlights on the Epsilon HMG and Shona, but he managed to kill the Daylami and have Shona get into CC with my Mukhtar Red Fury and downed him. Other things of note for the turn is his Nyoka FO was immobilized in places, which gave me a point on the board. Then he spends a couple other orders to reposition his Epislon HMG and his flash pulse bot, but also Shona engaged Knauf but Knauf managed to live. During this my opponent managed to get the Predator classified IIRC.
Turn Two: HaqqIslam
So in a slightly panicked state, I had moved Saladin up to try and shoot Shona to dislodge her and save Knauf. Which going as bad as I potentially expected, all my shots went into Knauf but he saved all but one so was just unconscious which I did not wish to happen. Then using the Hunzakut I had on the side and was not doing anything with, I shuffled the Hunzakut to engage Sona. Doing a surprise shot into Shona, she makes her dodge on a crit and engages with my Hunzakut which puts my progress back to square one. Not wanting to lose more models that could not act as shields for Saladin, I stop spending orders on that and view it as a lost cause for the most part. During this time his Nyoka managed to reset out of immobilized but managed to immobilize the FO again.
That's when we shift over to the one irregular order left on the Liberto in the second group, which for the most part I use to put his unconscious Santiago KHD in the immobilized state. This gives me another specialist of his locked down. There, we then reposition Zuleyka to engage Shona if she manages to escape. Before my turn ends my Al Hawwa Hacker managed to score the HVT hacking classified

Round 3Turn 3: StarmadaBeing that he is still down on points, he attempts to tie on specialists captured. Which due to my desperate play of trying to lock down Shona, she manages to immobilize the Hunzakut. There, he then moved up with his flash pulse bot and then repositioned his ML Chaksa Longarm watching the lane Zukelya will go down if she takes impetuous. This also gives him a chance to lock down my Al Hawwa hacker, which he manages to immobilize instead of isolate.
Turn 3: HaqqIslam
I needed to reset my Al Hawwa out of isolate but had to get rid of his flash pulse bot to do it. Zuleyka goes in to try and do it but she gets stunned by it after it passed all of its armor saves. Funny enough she does get hit with the missile but tanks all her armor saves. Since I could not make another attack with Zuleyka, the Liberto Minelayer is left to do it but manages to make it happen as the Flash pulse bot goes down. Next, I spend a few orders to get my Al Hawwa hacker out of its immobilized state, which takes his points off the board I then use the Barid KHD and presses one of the consoles, which no wanting to risk any more potential danger I call the game there with me in the lead.
HaqqIslam wins 5-1
Final Thoughts:
While the Hunzakut play could have been much better by laying a mine or two to deter Shona to some extent, I think it was the best play I could have done to stop Shona from getting to Saladin.
While I am planning on playing HaqqIslam for the next few months, I think HaqqIslam is the premier faction to highlight irregular orders so I built my list to include what I find to be the four main archetypes.
1. The Impetuous troopers (as played by Zuleyka in this battle report)
While not all Impetuous troopers are irregular, I would say a good majority of profiles with impetuous tend to have the irregular order. Which I find gets used to great effect to push order efficiency unless you are put into a position where the trooper in question is locked in a place that is hard to move forward. However, these troopers tend to be very inexpensive and can be good to soften up your opponent's deployment zone if it is allowed to get into it.
Granted in the game Zuleyka only provided smoke for Knauf and act as an corner guard, but if my opponent did not have something standing up then Zuleyka could have ran into his DZ to cause a lot of damage and potentially take out his haris if she could get in position.
2. Roadblocks and Piecetraders (as played by the Daylami and Liberto in this battle report)
As this describes, this is irregular orders that may not do much but be ARO pieces during the game for the most part. However, they have the potential to trade up their points value tenfold if they get a good shot in ARO or have the orders to spend can reposition or go on the attack. Which either they may die without killing anything (which is more what happens statistically) or can ruin your opponent's gameplay if they managed to get a lucky roll. The main point is that this type of irregular unit is meant to
In this case, my Daylami managed to delay my opponent for a few orders and my Liberto managed to make nearly six times his points during the game and would say was the lynchpin of making me able to win the game.
3. Off-table Piece (as played by Sir-Not-Appearing-In-This-Battle-Report)
While not part of my list in this game, it fits the role of something like the Bashi Bazouk or Yuan Yaun. Here, this would be a piece were it comes in and either becomes a nuisance for your opponent or clear your opponent's midfield of mines and other items. This said, the Bashi Bazouk has the benefit of a specialist profile to press buttons if the mission calls for it.
Due to the board set up, I think it would have been hard to benefit with a Bashi in the list if my opponent expected one to come up on the board as there are no good sides with enough coverage to land. However, if his stuff was cleared up it definitely would have been easier to do so without any threat.
4. The Inexpensive toolbox (as played by the Hunzakut FO in this battle report)
This could encapsulate a lot of different roles, but in this case, it was my Hunzakut. This would be the kind of irregular piece that can be used to move up and press buttons or set up the board state to make it more adventurous to the player in question.
If I was a bit smarter with the play of my Hunzakut this game, then I would have used it to possibly lay down a repeater on a group of my opponent's models to spotlight them, press the button on one of the consoles or put mines around Shona to make it a less appealing prospect to attack Shona. This said, the Hunzakut did alright for what it did this game in trying up Shona.
I may write a blog on this topic down the line, but the general gist is that running irregular orders requires a balance between regular and irregular orders or else your order pool begins to lack the resources to get the mission done.
Well this took a bit longer than I wanted to get out but I hope to get another report out soon! Next tournament I do promise to write up too!
Tune in next time as I possibly post my first impressions of the new ITS packet.